Delivery
Table of Contents
Introduction
Fuze delivery is a powerful system that provides the last mile of the configuration management chain. When the delivery system is utilized, configuration management is assured from build through delivery.
Delivery is unique in that you must use the WebUI. Fuze CLI commands for delivery do not exist.
Fuze can deliver through email and/or through a Jira Service Desk instance (Currently JSD delivery is disabled). The delivery and its contents are encrypted with a key or keys provided by the recipient and stored in the Fuze system.
Delivery Pre-Requisites
Universal FuzeID
Packages attached to the FuzeID
The FuzeID has a release status
The “deliver to” information has been populated into the “Customers List”
What is a Delivery Request?
The Fuze WebUI allows you to make a direct delivery, or create a Delivery Request (DR). A DR is analagous to a Pull Request (PR) in BitBucket, GitHub, etc.
The DR stages a delivery, but does not execute it. The WebUI presents an interface for comments and approvals by reviewers. Upon obtaining requisite number of approvals, the delivery can commence.
How Do I Make a Delivery?
Customers List
A delivery target is called a customer. A single customer entry in the Customers List can contain one or many recipients. Delivery is predicated on the fact that the targets are well-known and pre-populated into the Customers List. Anybody with Fuze credentials can populate an entry.
A customer entry requires the following:
Name: (required) Freeform text
Email Recipients: (required) At least one valid email address of a recipient. The delivery will be sent to ALL members of this list.
Authorized Senders: (required) At least one valid email address of an internal sender.
JSD Project: (optional) The project key for an existing Jira Service Desk instance
Public PGP/GPG Keys: (required) At least one public key for encryption. Note that the delivery package will be encrypted with this public key so any recipient must have the private key pairing to this public key. More than one public key is allowed, and all public keys provided will be used in the encryption.
Example Customer Entry:

Direct Delivery Procedure
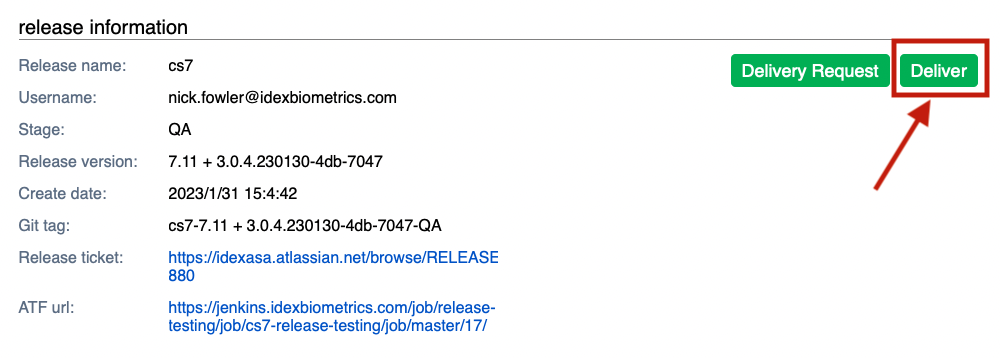
Choose a released FuzeID in the WebUI.
Click the “Delivery” button.
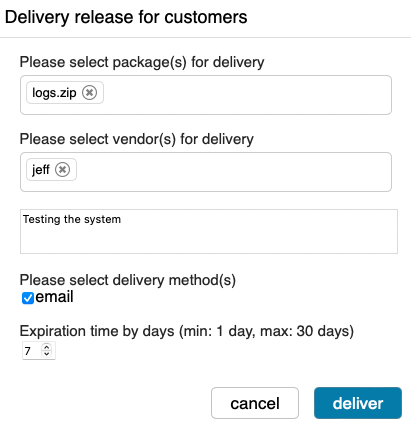
Choose which packages, the customer/vendor recipient, and the expiration time of the package link.
Provide a message or comment to be included with the delivery message.
Click “deliver.”
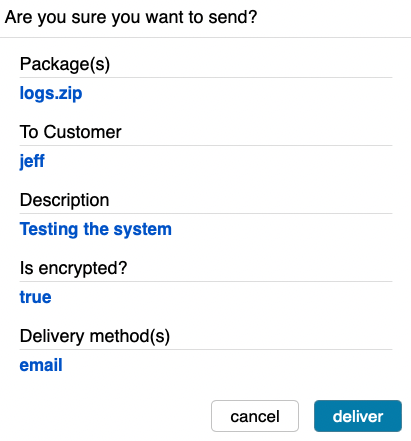
Review the information and click “deliver”
Delivery with DR Procedure
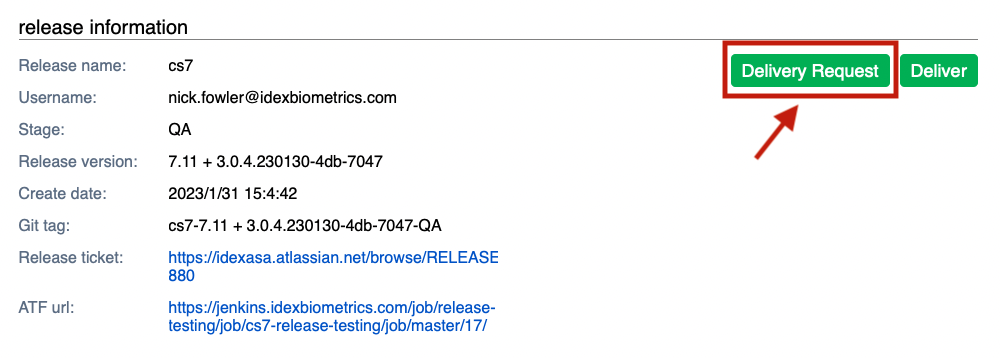
Choose a released FuzeID in the WebUI.
Click the “Delivery Request” button.
Choose which packages, the customer/vendor recipient, and the expiration time of the package link.
Provide a message or comment to be included with the delivery message.
Click “deliver.”
Review the information and click “deliver”
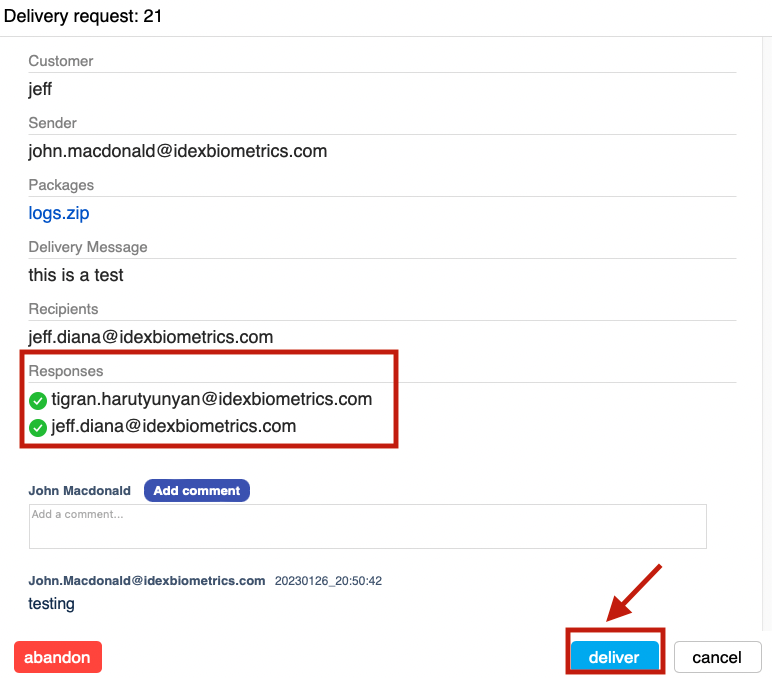
To complete delivery, you must now obtain the approvals from the people in the “responses” list. This list is comprised of the “Authorized Senders” for this customer/vendor.
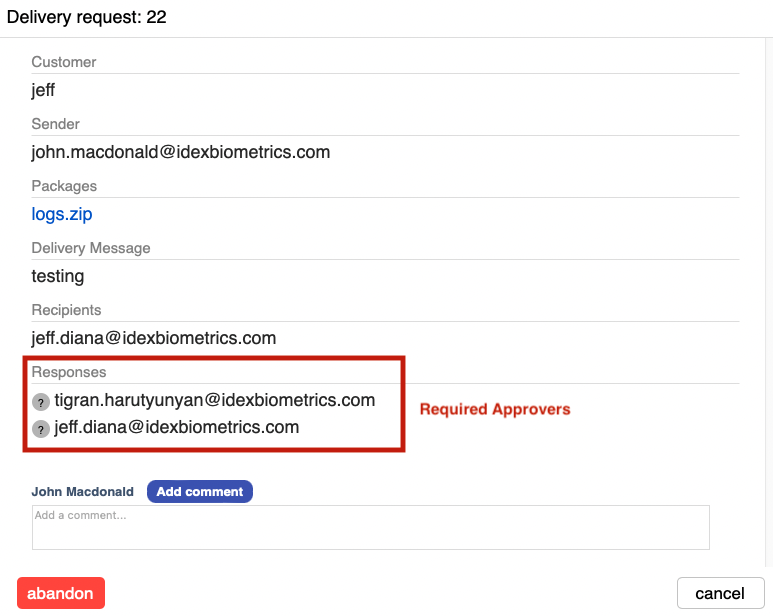
Once approvals have been given, you can click the “deliver” button. You may, at any time during this process, click the “abandon” button to delete this DR.
Preparing Packages for Delivery
Put together the files you want to send to customers
ZIP the files into 1 ZIP package.
- Filename rules for the ZIP package
Filename MUST NOT have spaces. Use underscore “_” or hyphen “-” as needed.
Filename MUST be shorter than 40 characters (including the hyphen or underscore)
- Assign ZIP package to Fuze
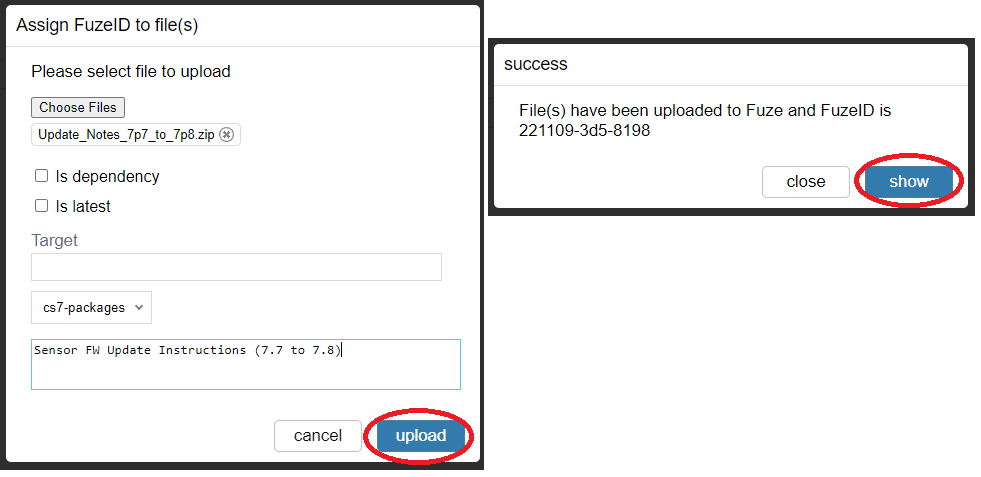
Click on Assign FuzeID

Choose Files, Select Product and write a description
In the “Select Product” field, choose csx-packages (x=6,7,8)
If there are no drop down entries, click “cancel”, refresh the webpage and go back to step (b)
Once you are happy with the details, click on “upload”
Fuze will assign a FuzeID and display it. It is important to click on “show”.
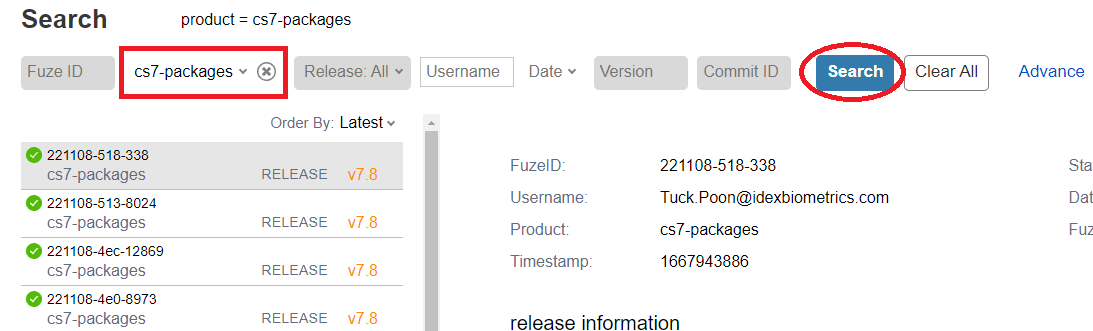
If you missed it, you can search for it on the main Fuze page. Select csx-packages in the “Product” list. This is why it was important to define this when creating the FuzeID.
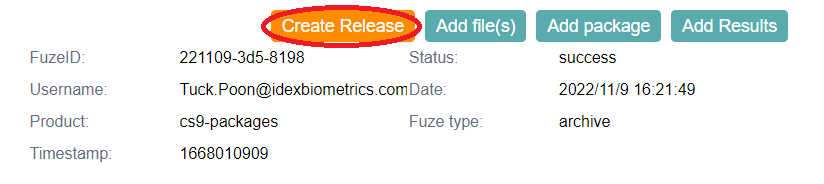
- Once you are happy with everything, create the Release
Click on the Create Release button
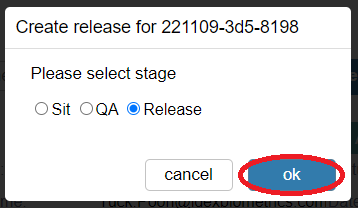
In the dialog box that pops up, select “Release” and click “OK”
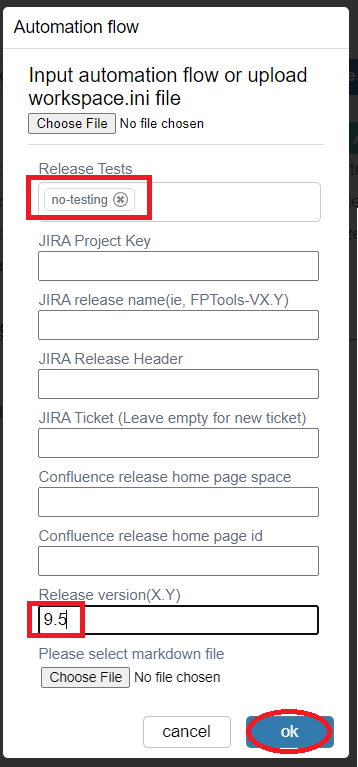
A new dialog box pops up. In the “Release Tests” section, select “no-testing”, and in the Release version(X.Y) section, enter any version number that is relevant, i.e. 7.10, 9.5, etc
Once that is complete, click OK.
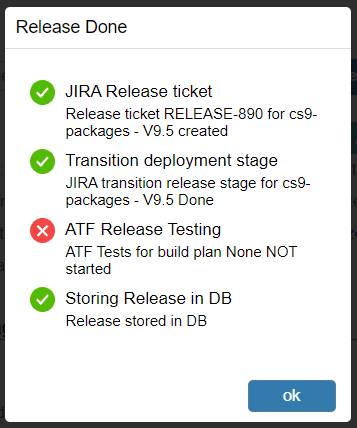
The Release process will begin and the FuzeID will transition to a “RELEASE” stage. There will be a red cross for ATF Release Testing. This is ok as no ATF testing was done. Click OK to close the window.
- The Fuze package is now ready to be delivered to a customer
2 new buttons will appear on the FuzeID. Deliver immediately delivers the package to a customer
Delivery Request will put the delivery in a “pending mode” until approved by someone else. This is still being trialed, so the recommendation at the moment would be to use the “Deliver” button. Please see the instructions in the above section Direct Delivery Procedure
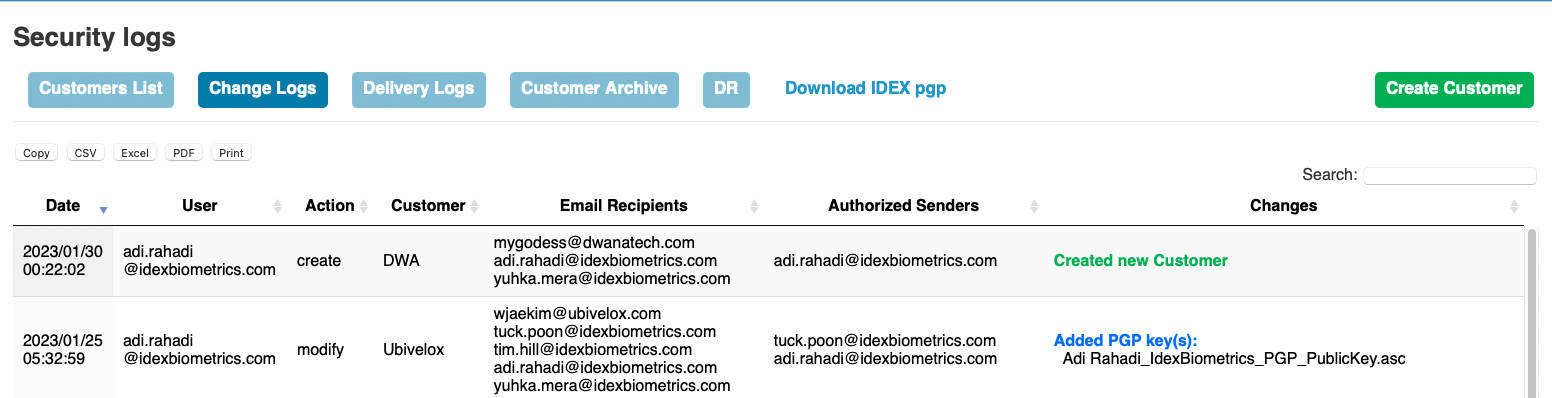
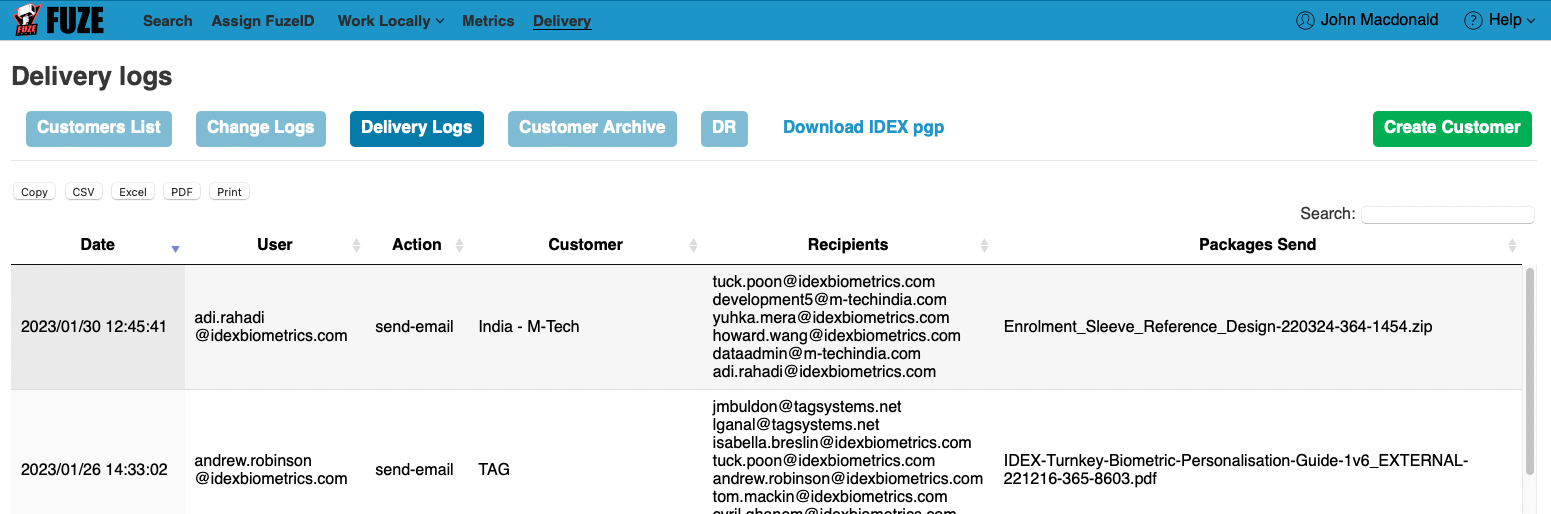
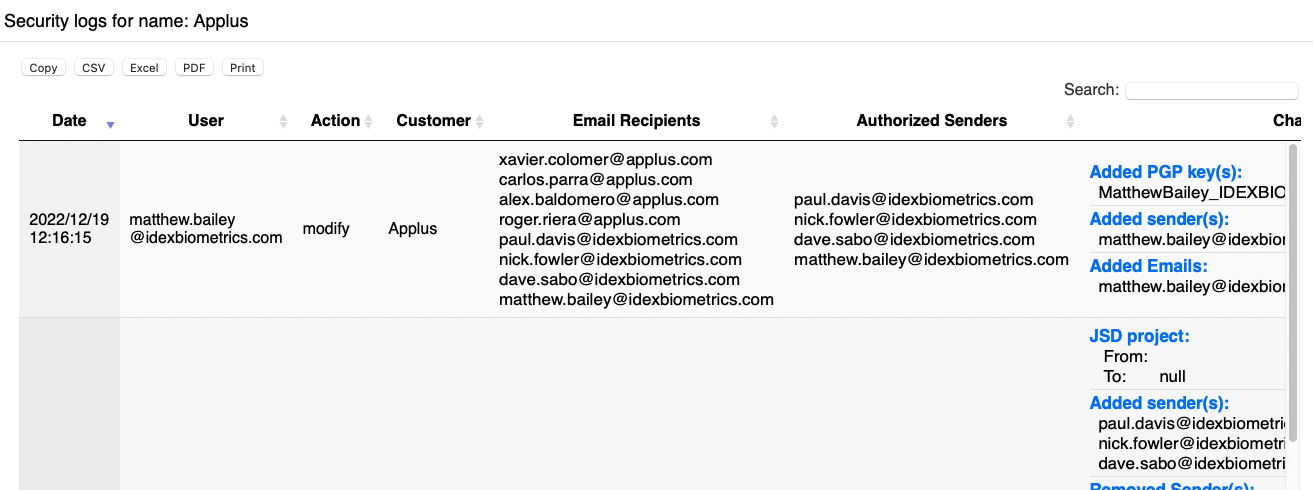
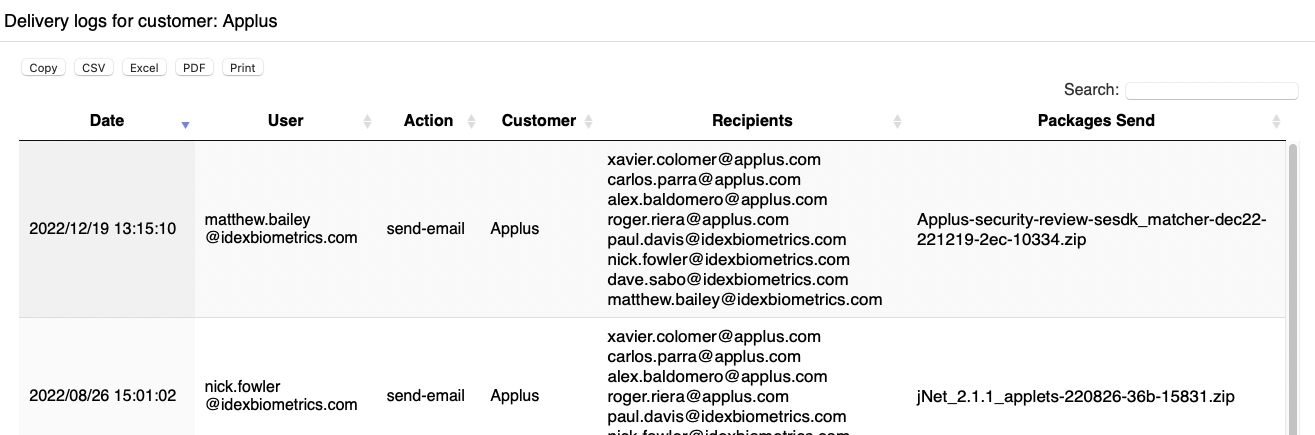
Delivery Configuration Management and Traceability
The Delivery UI provides full traceability for all deliveries. Logs are kept and viewable for both customer list transactions as well as all delivery actions.
This includes:
Customer creation
Customer modify
Customer archive
Delivery execution
DR creation
DR execution
You can view the overall logs or logs for a particular customer. Here are some examples.
Package Encryption/Decryption
PGP/GPG encryption will be performed on each package selected for delivery with all public keys applied to a customer entry. Fuze Delivery will also sign each package with our generic automation user’s private key – “IDEX Automation” (user email: idex-automation@idexbiometrics.com).
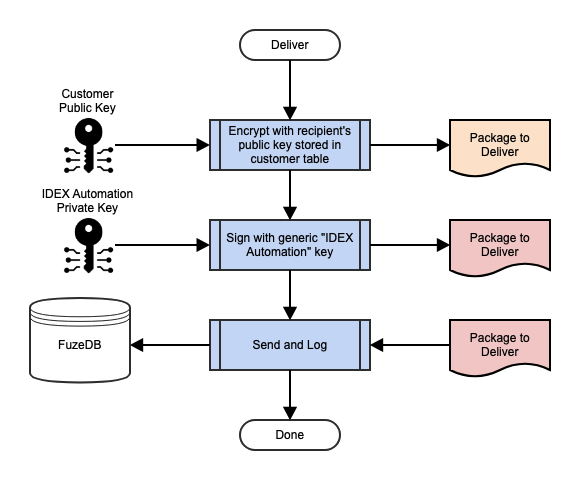
Depending on the software used on the customer end it may be required that they import and certify/trust our “IDEX Automation” public key in order to successfully decrypt. This public key is available to be downloaded from the Fuze Delivery Portal.

Please note that when downloading the public key to a Windows machine the key file will be assigned a .sig extension by default. PGP/GPG keys are generally armored ASCII files designated with a .asc extension. So renaming the key before sharing it is suggested.
We have observed this required step of importing and certifying a key with Kleopatra where by default the software will first verify a file’s signature and will not perform the decryption unless that verification is successful.